Air Quality Index Monitor (Arduino Uno) Measures AQI with MQ135
Arduino Uno AQI device measures pollutants, temp, humidity; LCD shows real‑time accurate air quality index.
Preview Gallery
2 media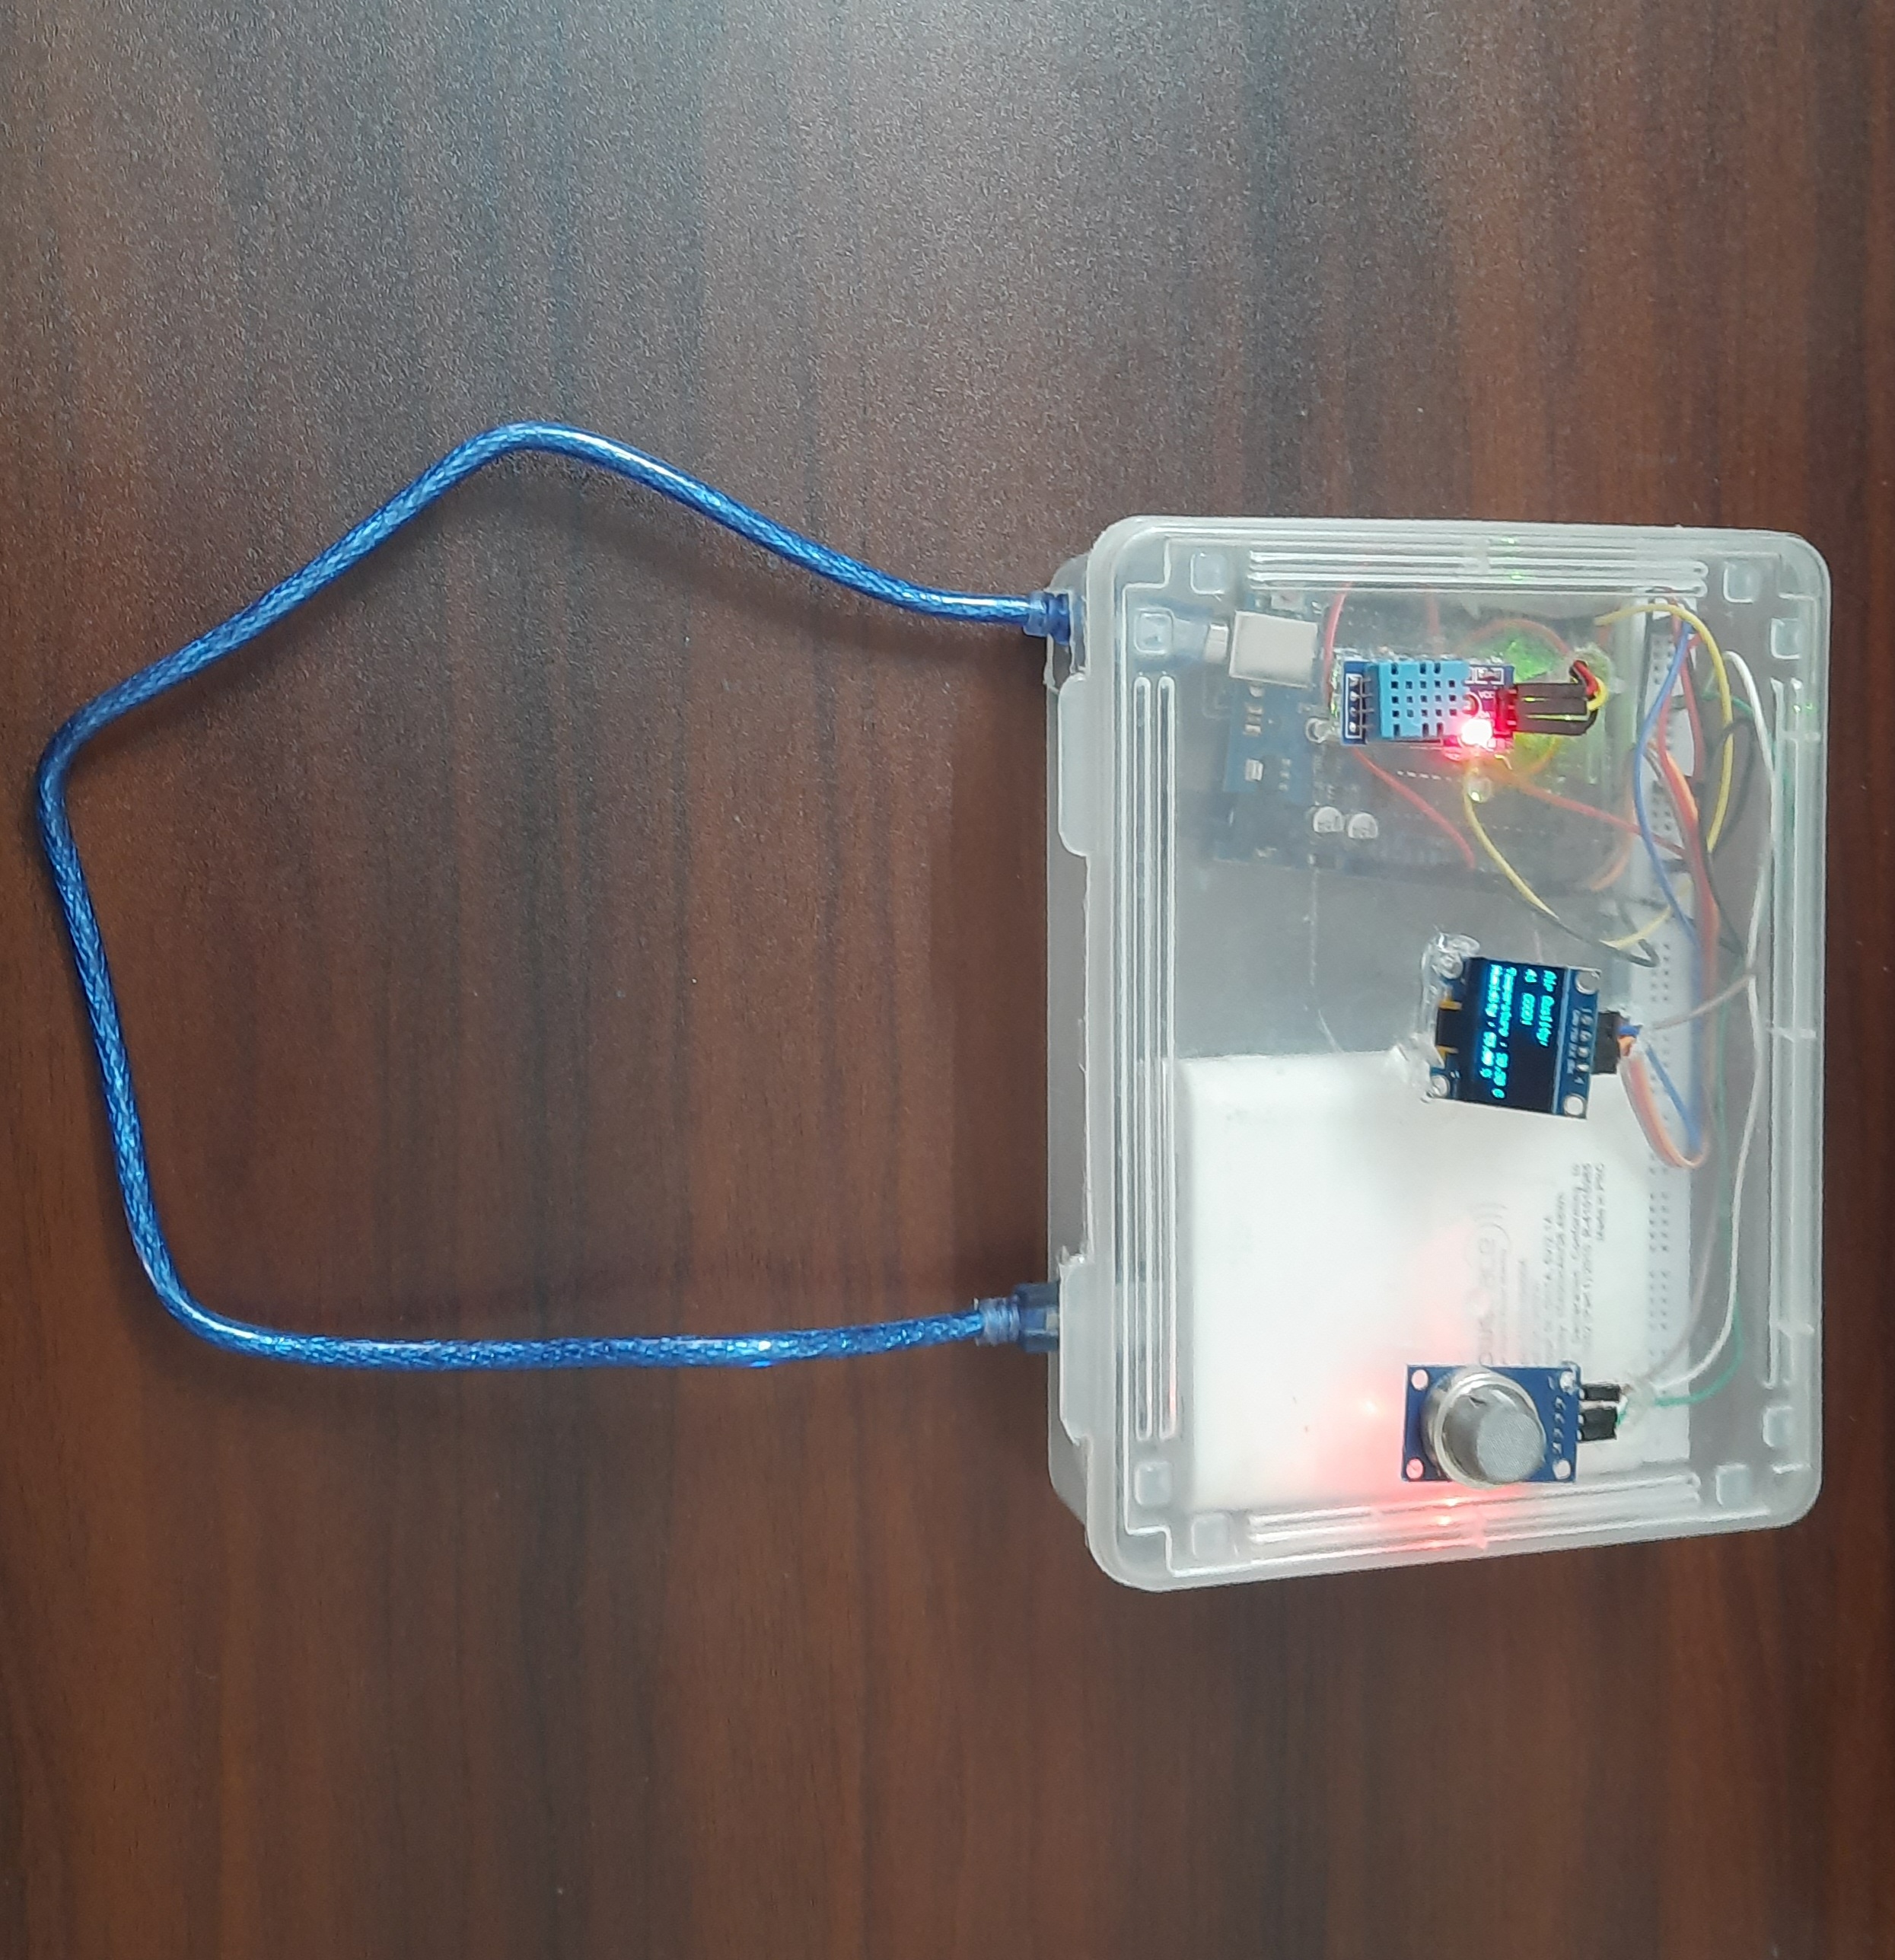
Technologies & Skills
Limited time offer
Hardware costs: Arduino Uno (~₹1,000), MQ135 sensor (~₹500), DHT11 (~₹200), LCD (~₹300), jumper wires, breadboard, battery (~₹500). Assembly & testing: Skilled labor, wiring, calibration, and coding (~₹3,000). Software & code: Custom Arduino sketch for AQI calculation and display (~₹2,000). Educational value: Ready‑to‑use project for exhibitions, IoT learning, and environmental awareness (~₹3,000). Total justified price: ~₹10,000 Discounted to ₹8,000 for students and early buyers.
What's Included
Support & Customization
Resource Links
Purchase this project to unlock source and premium resources. Document/report remain secure preview-based on this page.
Air Quality Index Monitoring Device — Detailed Overview
What it does:
This device continuously measures the quality of air in the surrounding environment. Using an MQ135 gas sensor and a DHT11 sensor, it detects harmful gases, temperature, and humidity. The Arduino Uno processes this data and calculates the Air Quality Index (AQI), displaying results on a 16×2 LCD screen. The output shows both the numeric AQI value and a status message (e.g., Good, Moderate, Unhealthy).
How it works:
- The MQ135 sensor detects pollutants like CO₂, NH₃, and other harmful gases.
- The DHT11 sensor adds temperature and humidity readings.
- The Arduino Uno collects sensor data, runs calculations, and determines AQI levels.
- Results are displayed on the LCD in real time.
- Optionally, data can be sent to a smartphone dashboard via WiFi module for remote monitoring.
Who it’s for:
- Students: Perfect for science exhibitions, school projects, and IoT learning.
- Educators: Demonstrates environmental monitoring and sensor interfacing.
- Hobbyists: Great for DIY electronics and Arduino enthusiasts.
- Communities: Useful for raising awareness about local air pollution levels.
Future Enhancements
Known Issues
Installation
vonnect one end of the given cable in to a powerbank and the other USB side into the Arduino UNO
Usage
as the circuit is supplied with power, it can be demostracted as a working project by blowing air into it or using a lighter to release gases.
System Requirements
well-powered power bank
Slides Open in New Tab
For better readability, slides are opened directly. Documents remain preview-only with secure backend rendering.
Showing preview pages only. Purchase for full access to all pages and complete source package.
Login for Full AccessNo Q&A available yet
Be the first to ask a question!
Ask a Question
Customer Reviews
Write Your Review
No reviews yet
Be the first to review this project!